Putting the layout back together — Update #4
Recording the progress of building the Denver’s RailRoads N Scale layout
All genuine posts are welcomed and will be acknowledged. Please submit your first post by email to: dennis@denversrailroads.com
Putting the layout back together — Update #4
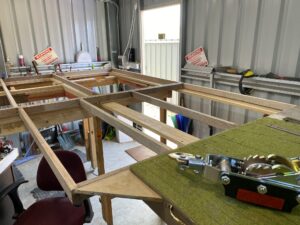
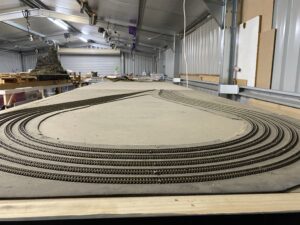
Rebuilt module 5a which completes the DUT coach yards and loco servicing. Used a 915mm continuous hinge and bolted it onto module 4.
No idea if I am going to be able to winch modules 2, 3, 4 & 5a up as one unit. Will test shortly. Fastening the pull-along winches to the ceiling is a big job but the hardest part of the operation is getting the winches to release the wires after pulling up the modules so that they return to level bench-work.
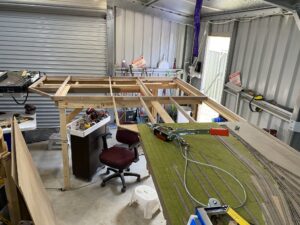
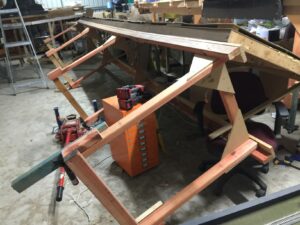
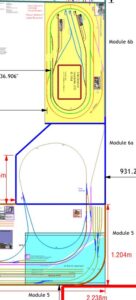
Finished the framing for modules 5b and 6a. After much thought have decided to use continuous hinges along the back 2.3m edge. It makes track and turnout wiring so much easier. The modules cannot be flipped once you add scenery and buildings but by then the track and turnouts should be well bedded in.
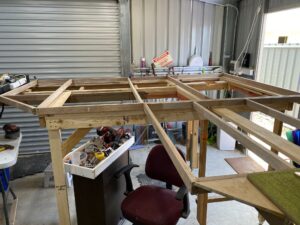
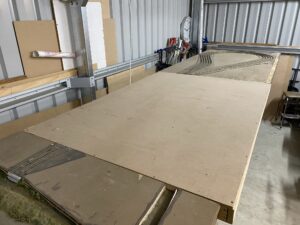
Just need to add plywood or MDF to the frames and it will be time to start laying track – at last.
Putting the layout back together — Update #3
Modules 1 & 1a bolted together and
level with modules 2, 3 & 4.
Connecting the L girder framework for modules 5 & 6 to module 4 is next on the list followed by the framing and the connection to module 7.
For an understanding of which module is which click here to view the trackplan.
Putting the layout back together — Update #2
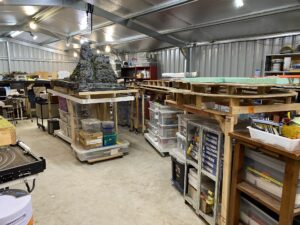
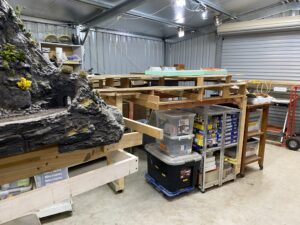
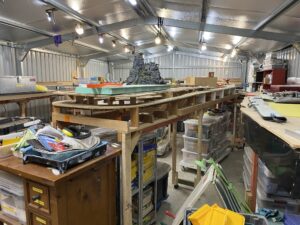
Making good progress. All of the spotlights for Phase 1 have been installed together with 6 spotlights over my desk and the working area of the garage. As can be seen from the photographs all of the tools, modeling parts, kits and scenery supplies have now been placed in plastic boxes on carts under the layout. All of the carts and furniture are on wheels.
Time to start connecting all of the modules that make up Phase 1.
Putting the layout back together — Update #1
Soon after my last post in January we actually moved into our new home and began to shift all the boxes and furniture out of my garage and into the house. That is when the fun really started. At first I was busy moving into the house but when I came to work on the layout modules that we had moved from Townsville I ran up against all sorts of challenges, in particular adding longer replacement legs to the modules whose legs had been damaged in transit and adding complete new legs and frameworks for two of the modules that had been shipped legless to sit on. I also decided that the section on which modules 5 & 6 were built needed to be rebuilt and as I have never been happy with my track-work on that section Ii removed all of the tack pending a re-build.
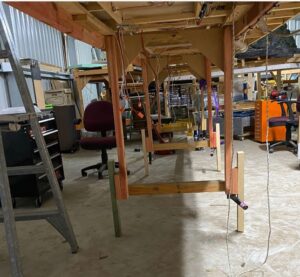
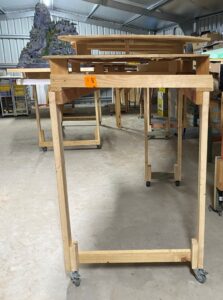
Then disaster struck. My largest module, made up of three 6 foot modules (Mods 2, 3 & 4) bolted together, fell over whilst i was adding a new leg. It took a whole week with 2 pull-along winches, 2 double pulleys and 2 car jacks to lift the module into the air and right it on its broken legs. A mess as can be seen by the first two pictures. The third picture shows the module on it’s new and stable legs and the forth, a picture of modules 11 & 12 on their new frameworks and legs.
Kato Test Track — Speed Matching Update
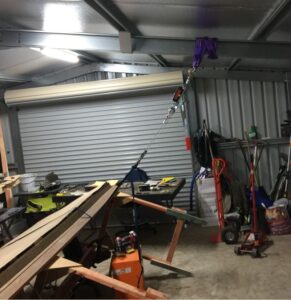
Speed matching was put on hold pending the big move. Unfortunately I did not put away all the locos and freight cars sitting on the test track layout . So to punish me for my carelessness the whole test track layout fell over as I was positioning modules 1 to 4 in place. After I finished crying I picked up all the loco and freight car bits and put it in one big box which I have yet to inspect. I am not looking forward to finding out what a mess my brand new Atlas GP-30’s are in. The lid of the control panel of the test track layout was also broken off its hinges.
I considered breaking up the Kato test track but on checking my CADRail drawings I realised that it could fit onto the module 6b L-girder framework as a temporary part of the re-build of modules 5 & 6. As the track-laying for modules 6a & 6b are part of Phase 2 of the layout, that will not be started for a year or three, so in the meantime the test layout could be well used for loco testing. A modified part of the track-plan follows. To see details of the three phases of construction check out https://denversrailroads.com/DPoverview.htm.
As can be seen, with a minor alteration a connection can be made between the Kato test layout and the main layout. This could be used as a convenience to move trains between the layouts or the test track could be operated as the Leadville branch of Denver’s RailRoads, as it was originally designed.
As of the date of this blog all of the modules are now in place but I still have the following woodworking jobs to complete:
- Install 20+ stand alone spot lights, including 13 over modules 1 to 5, 4 over modules 5 & 6 and the remainder over my work desks situated around module 10.
- Add longer legs to module 8
- Bolt modules 10 & 11 to module 8
- Finish building the framework for modules 5 & 6
- Attach modules 5 & 6 to module 4 at one end and module 7 at the other end
- Bolt together modules 1 & 1a
- Build new module 9 ( a long time into the future)
I can then start the track-laying for Phase 1. To understand which module is which check out the track plan at https://denversrailroads.com/Denver/DR-Layout/DR127A3.pdf.