N Scale
Recording the progress of building the Denver’s RailRoads N Scale layout
All genuine posts are welcomed and will be acknowledged. Please submit your first post by email to: dennis@denversrailroads.com
Daily Progress & Error Blog
Actioned since 10th May 2023:
- Extended BUS wiring to second PD4 (Gore Canyon) module and control panel.
- Laid cork roadbed to Edna Mine, etc on the Craig Line.
- Began to install PD4 feeder wires.
- Laid NO-OX grease on PD6 & PD7 loop trackage.
- D&RGW F7ABA runs very well on this track
- Cleaned with a Peco block rubber all of the problem spots on PD2 & PD5 trackage in preparation for laying NO-OX on this track
- Note that all testing has been conducted at NCE speed notch 10 (16 scale mph)
- Relocated BD-20s and Accessory point motor controls on South Denver PD11 loop.
Immediate Action:
- Lay NO-OX on PD2 & PD5 track and test the loop.
- Lay CRC Di-electric grease on PD3 & PD4 trackage and test with ATSF locos to be used at the AMRA show during June holiday weekend.
- Investigate and maybe fix the “short” problem running lighted passenger cars on PD2.
- Continue installing feeder wires on PD4 (Gore Canyon) module and test.
- Lay Craig Branch trackage and wiring.
Ongoing Action:
- Fix or replace sticky point motors: P313;315;317;318.
- Design PD4 control panel diagrams with Visio and install switches and LEDs.
- Build PD3 & PD4 kits and install scenery.
- Rewire South Denver PD11 trackage and control panel.
- Finish building South Denver kits.
- Test run trains from South Denver to Grand Jct. and return.
- Lay all of the Grand Junction return loop tracks.
- Lay DUSTY tracks and build livestock kits.
- Build kits for the layout trackage laid.
Daily Progress & Error Blog
Actioned tonight:
- Finished installing all of the PD4a point motors:
- P319;320;314;316;319;320 work ok.
- P313;315;317;318 have issues and may need to be replaced.
- Started using new DCC Concepts soldering iron with temp control and auto turn off. Pretty good results so far.
Immediate Action:
- Finish the BUS wiring for PD4.
- Fix or replace sticky point motors: P313;315;317;318.
Ongoing Action:
- Need to investigate stalling problems with Big Loop turnouts.
- Solve “short” problem running lighted passenger cars.
- Complete laying track from Bond to Craig and temporarily wire.
- Design PD4 control panel diagrams with Visio and install switches and LEDs.
- Lay all of the Grand Junction return loop tracks.
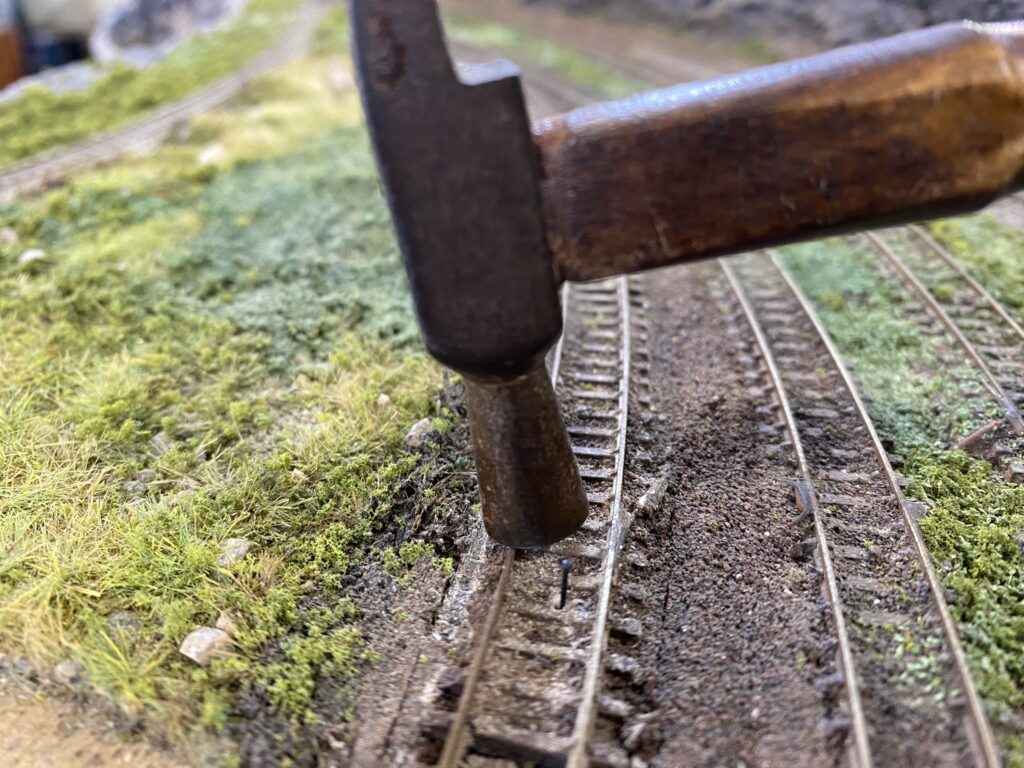
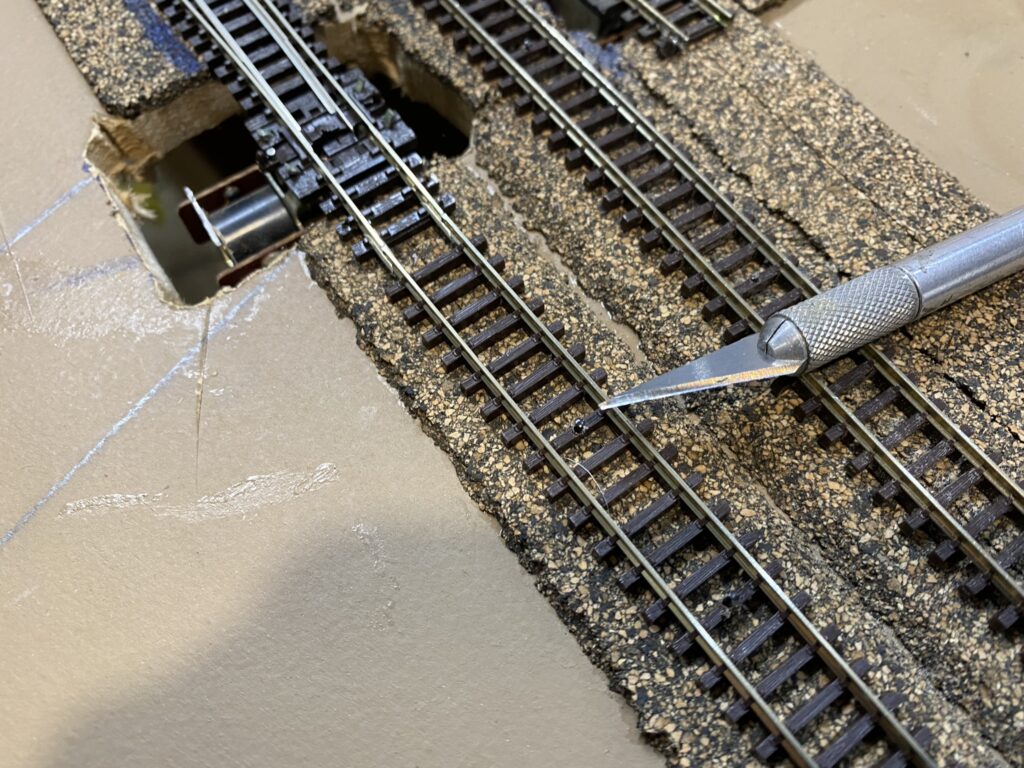
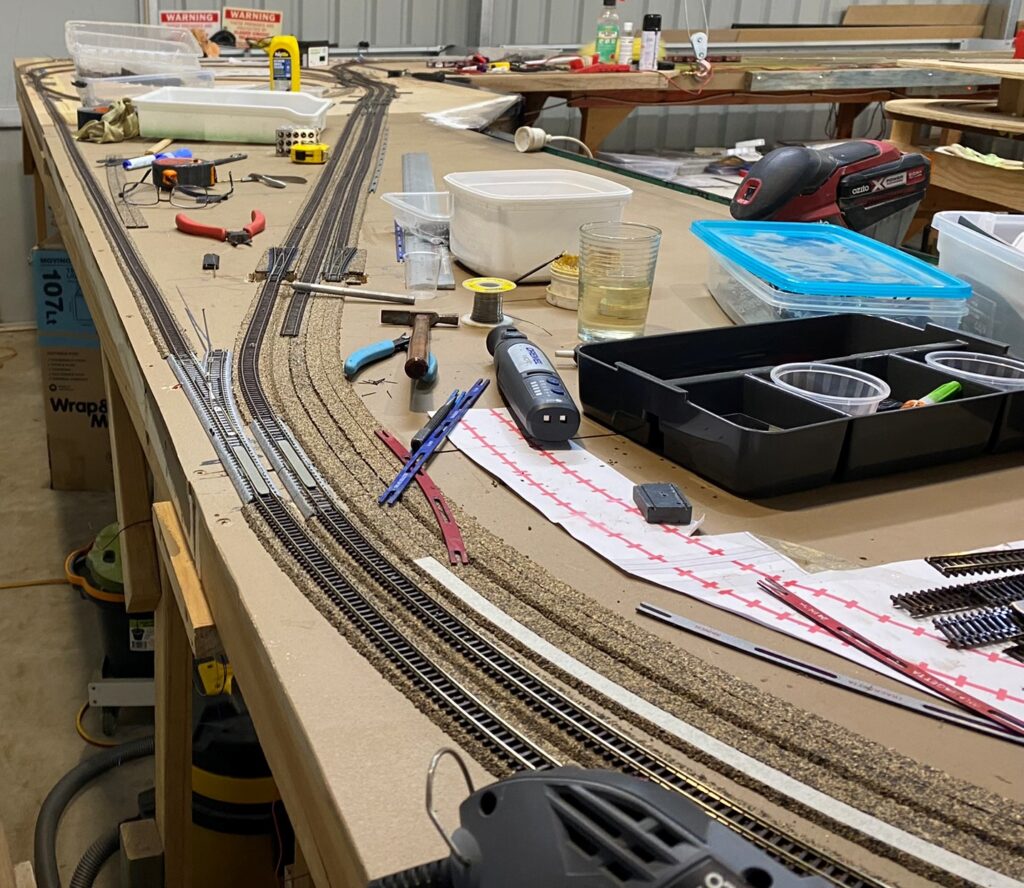
Driving the Golden Spike (aka Peco Pin)
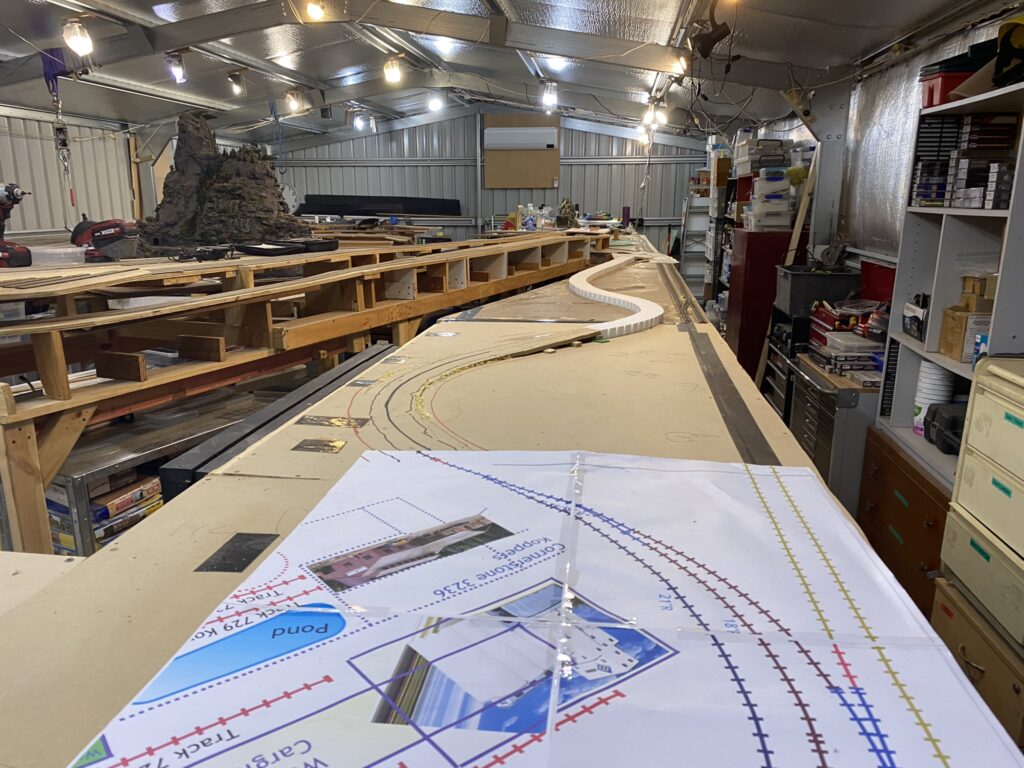
At last I have finished laying all of the main line trackage and joined the east and west track at Bond as can be seen in the last picture. This is the Rio Grande main line from Denver through the Flatirons, past Pinecliff siding, though the Moffat Tunnel and on past Winter Park, Grandby and Kremmling to the Gore Canyon and Bond.
I now have to connect all of the feeder wires to the tracks. The point motors are already wired as I do that as I go. However I still need to connect the point motor wires to the front of the layout for easy connection to a control panel. I am in the process of doing this wiring as I write.
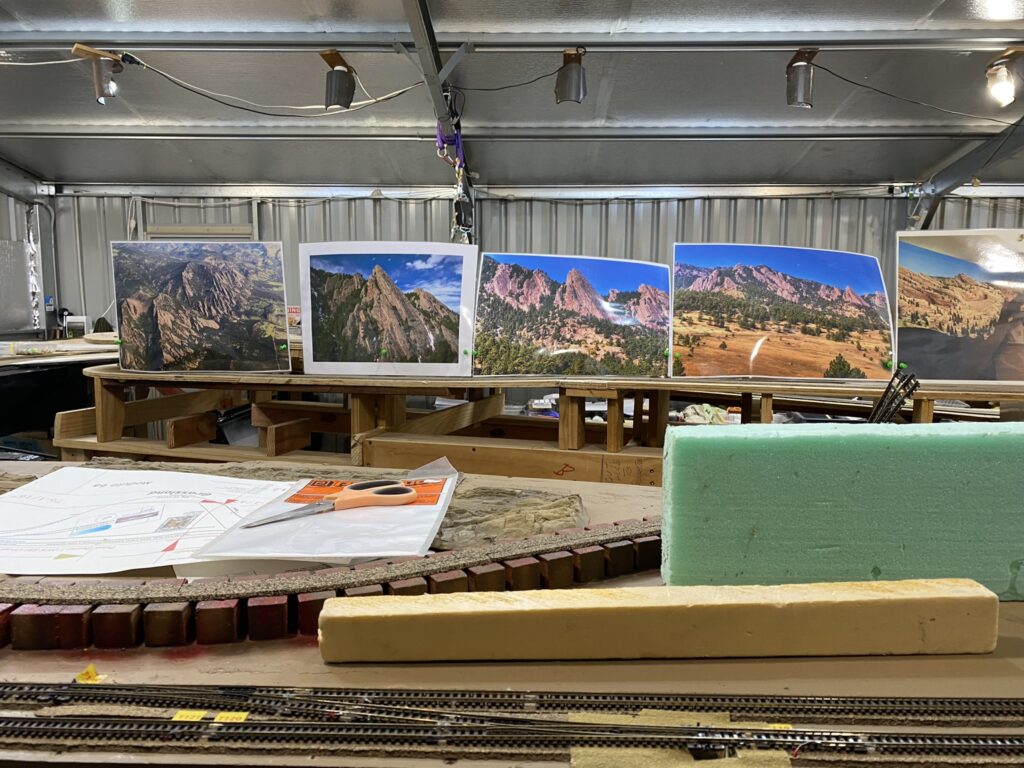
The first section after North Yard is what I call The Flatirons Module (actually modules 7 & 8 — see first photo below) and I have already created a control panel for that module. I plan to use that module as a test bed for not only wiring, but also scenery and signals. Once successful I will move on to the Winter Park and Grandby Module (module 11) followed by the Gore Canyon (already scenic-ed and wired) and Bond Module.
Then, with both the UP/CB&Q and D&RGW main lines in operation, it will be a case of working though the list of outstanding actions as published on the Layout Overview page of the main website at https://denversrailroads.com/DPoverview.htm. Note that the completed actions have been crossed out and that some changes have been made since first publishing the overview.
Note also that there is an updated version of the Denver’s RailRoads track plan after all of the photos.
Denver’s Railroads Track Laying Plan in the 6 phases:
Phase One — Modules 5 to 8:
All of the track from Utah Junction though Pinecliff to the East portal of the Moffat TunnelAll of the main lines from Utah Junction to the East Denver Belt Line turning circleDRGW MoW Yard- Denver Union Stockyards
- UP Main Yard
Phase Two — Modules 9 to 12:
The D&RGW main line from the East portal of the Moffat Tunnel to Glenwood Springs- The 7 staging tracks of the Grand Junction return loop
- Golden and Glenwood Springs industries
Phase Three — Modules 2 to 4:
Denver Union Terminal (DUT) Main Lines- CBQ Rice Yard
- CBQ & DRGW Coach Yards
- East Denver Belt Line industries
- CBQ Engine Terminal
Phase Four — Modules 1 to 1a:
- Re-lay the Joint Line return loop track and industrial trackage
- Build the South Denver industry kits
- Build Burnham Shops kits
Phase Five — Modules 2 to 5:
- DRGW & UP Industrial Branches in front of DUT and industries
- UP Pullman shops
- UP Coach Yard
Phase Six — Modules 6 to 6a:
- DRGW North Yard
- DRGW industries
- Commerce City industries
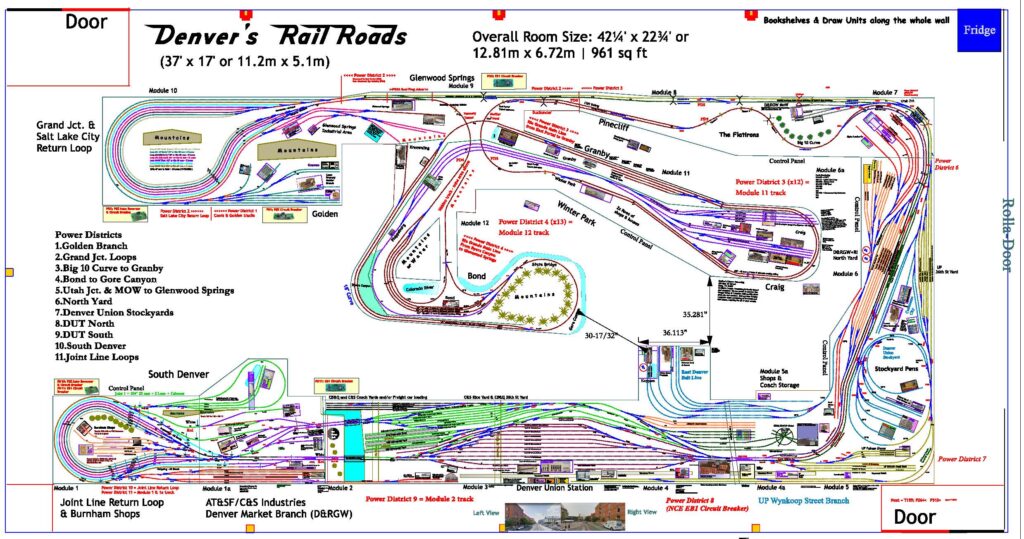
See the hi-res pdf version at https://denversrailroads.com/Denver/DR-Layout/DR153A3.pdf
Building the Rio Grande line to Glenwood Springs
A while ago I finished building the UP/CB&Q/AT&SF/C&S/ROCK main line North and East from Denver to the return loop at the end of the layout. By and large the track will be concealed from viewers by way of either a gully or a tunnel, so it is not very exciting, but its a way of moving trains in and out of staging (the return loop) for the Denver’s RailRoads listed.
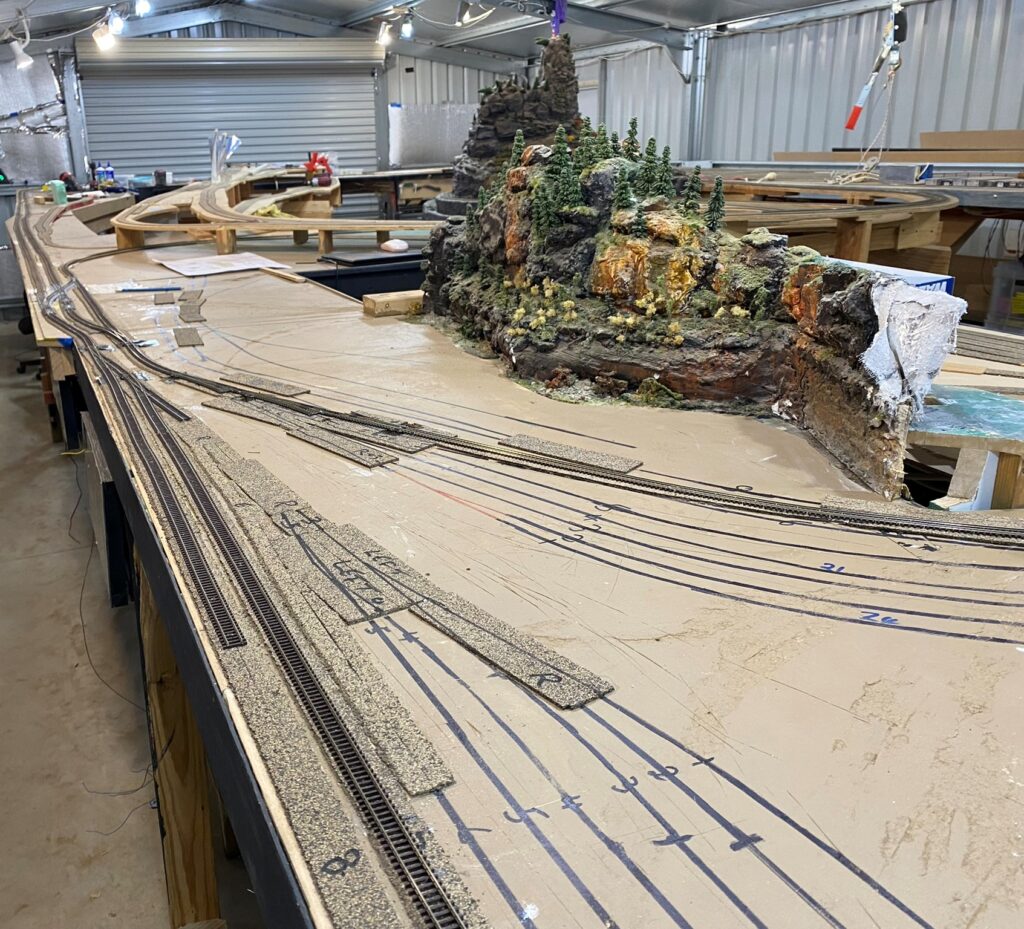
However the main attraction is going to be the Denver & Rio Grande Western main line thru the Moffat Tunnel from Denver to Glenwood Springs. This line will provide passing sidings, industries and spectacular scenery, including the Flatirons, the Moffat Tunnel and Byers and Gore Canyons, together with mountain grades and eventually a branch to Craig.
Work recently commenced as can be seen in the following photographs.

That’s it for now. The next job is to lay a crossover ahead of Granby Station and spurs to the Granby Sawmill, Independent Propane Co and Granby Auto Parts, all existing industries that have decided to add a connection to the Rio Grande Railroad in order to improve the efficiency of their operations.
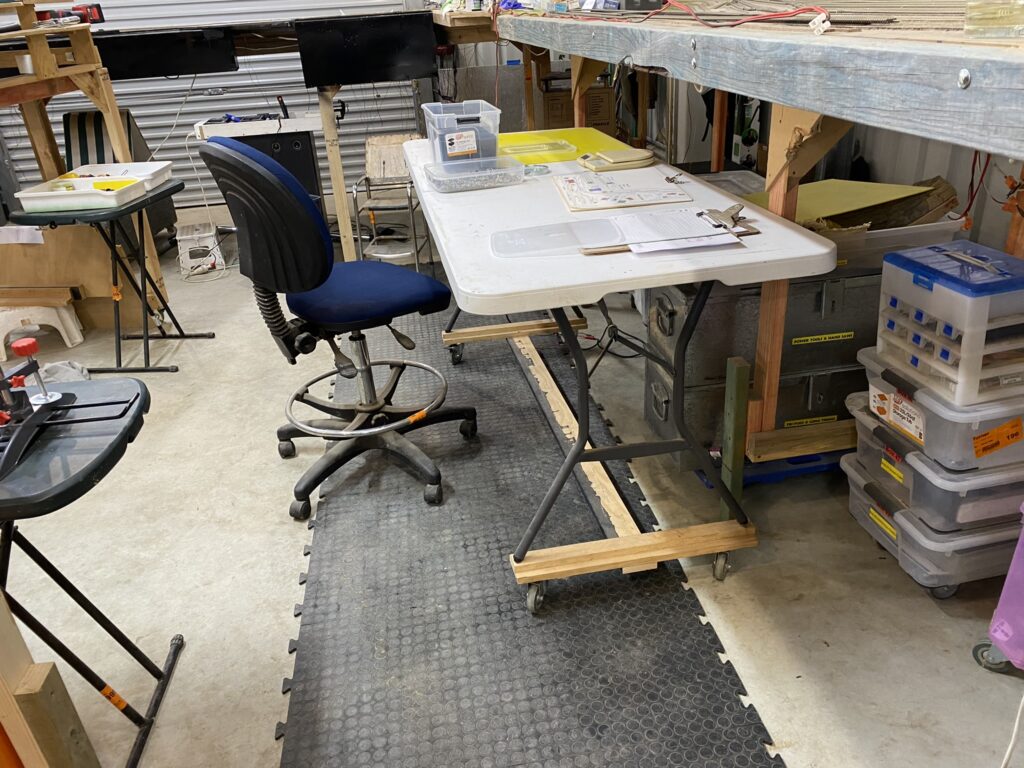
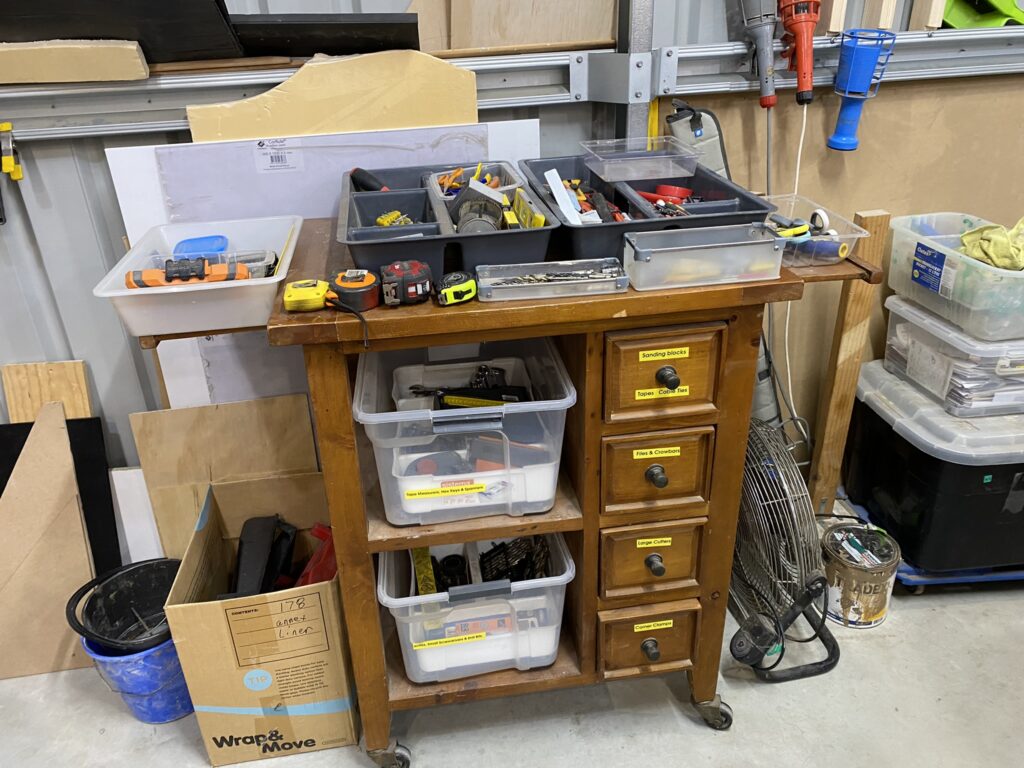
What’s on my Workbench

Another “Final” Track Plan
A while ago I decided to replace the East Denver Belt Line on Module 8 with the Rio Grande (D&RGW) main line from Denver to the East Portal of the Moffat Tunnel which previously had been mainly hidden trackage. So far so good.
However, I really did want to keep the industries of The East Denver Belt Line (aka Northwestern Terminal Railroad or NTR), a sprawling group of Denver industries between Utah Jct. at the north end of the D&RGW North Yard and Commerce City as can be seen in the map shown at Denver-Belt-Line-Map.pdf (denversrailroads.com). However, many of these industries were not established in the 1950’s and 60’s so I am really only concerned with those industries that were in existence back when Denver’s RailRoads is set (1947-1967), including:
- Conoco (Continental Oil) Refinery. Built 1930.
- Brannan Sand & Gravel. Est. 1906. Manufactures Aggregates, Asphalt Paving and Concrete.
- Weyerhaeuser Distribution Center. Est. 1921. Suppliers of building materials.
- Eaton Metal Products. Est. 1924. Fabricates a wide variety of vessels & tanks.
- Kopper’s. Est. 1923. Manufactures treated wood products
- Central Fibre Products Co. Est. 1931. Manufactures of packaging solutions.
- Denver Union Stockyards including:
- Denver Union Stock Yard Exchange Building. Built 1881;
- The Colorado Packing and Provisions Company, aka Armour & Company. Built 1917;
- Swift & Company, who began operating in the McConnell Building in 1951.
In the event it was not too difficult a task as the Rio Grande North Yard is on the west side of Denver and the Union Pacific’s 36 St. Yard and Pulman Yard were on the east side. As the East Denver Belt Line ran from the west to the east planting these industries between the two made geographical sense and will create a natural scene divider. I had no choice but to use modelers license and extend the Belt Line, with three of the industries, into Burlington territory where there was some free real estate.
If you are familiar with Denver city, you will know that the CB&Q 38 St. Yard is also located between the D&RGW and UP yards. But apart from the lace of space it would be one yard too many for a model railroad. Consequently, the CB&Q will have to share space with subsidiary Colorado & Southern’s Rice Yard which in the 1950’s was located adjacent to Denver Union Station.
To view the latest “final” track plan go to document (denversrailroads.com).
A Change of Direction
I had planned to complete the South Denver module 1, aka as the Joint Line Return Loop & Burnham Shops, to operational stage. Unfortunately, the size of the wiring job has somewhat overwhelmed me, largely because:
- I wired all of the block detectors with the baseboard in a “pop-up” vertical position and did not take into consideration access after it was lowered back onto it’s normal horizontal position.
- Wiring individual DCC accessory decoders for 40 turnouts is a long soul-destroying job.
- I use solid wire which has many advantages. The one major disadvantage is that the one strand can easily break.
- For economic reasons most of the turnouts have been re-used from previous layouts. This has led to questionable trackwork.
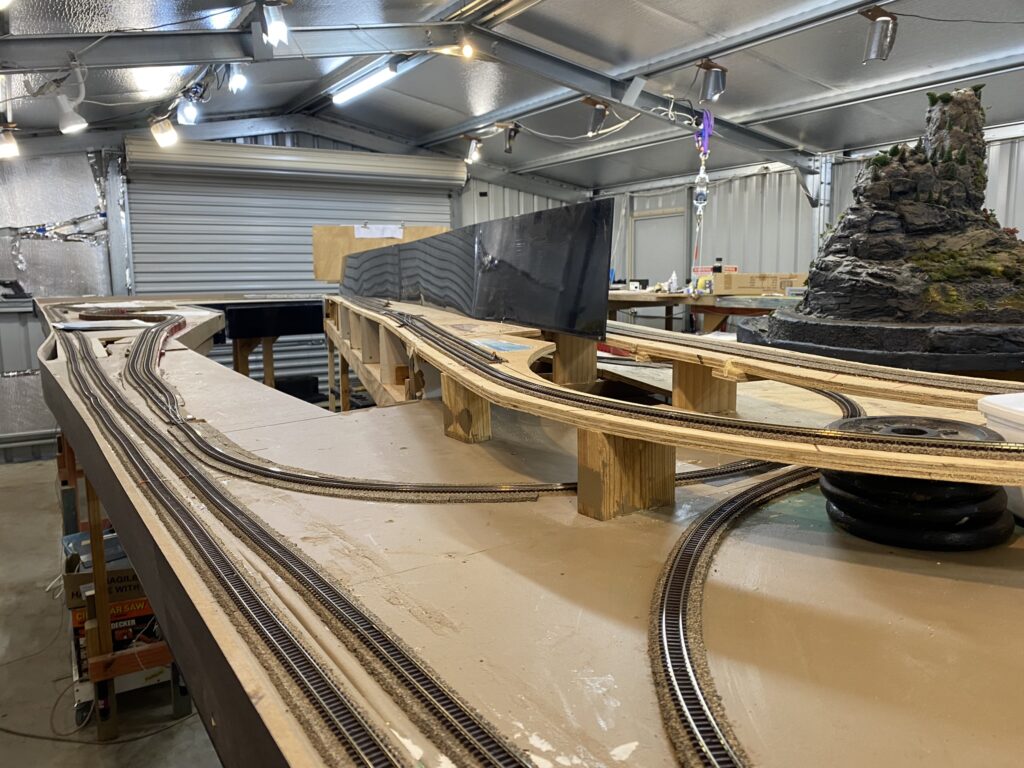
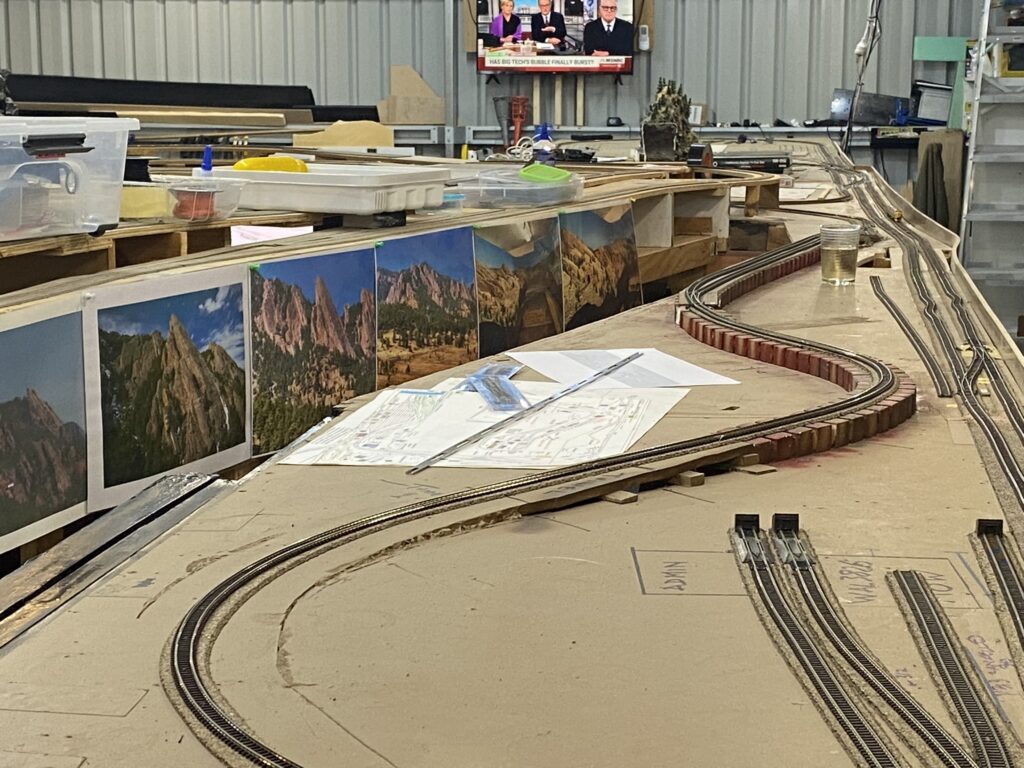
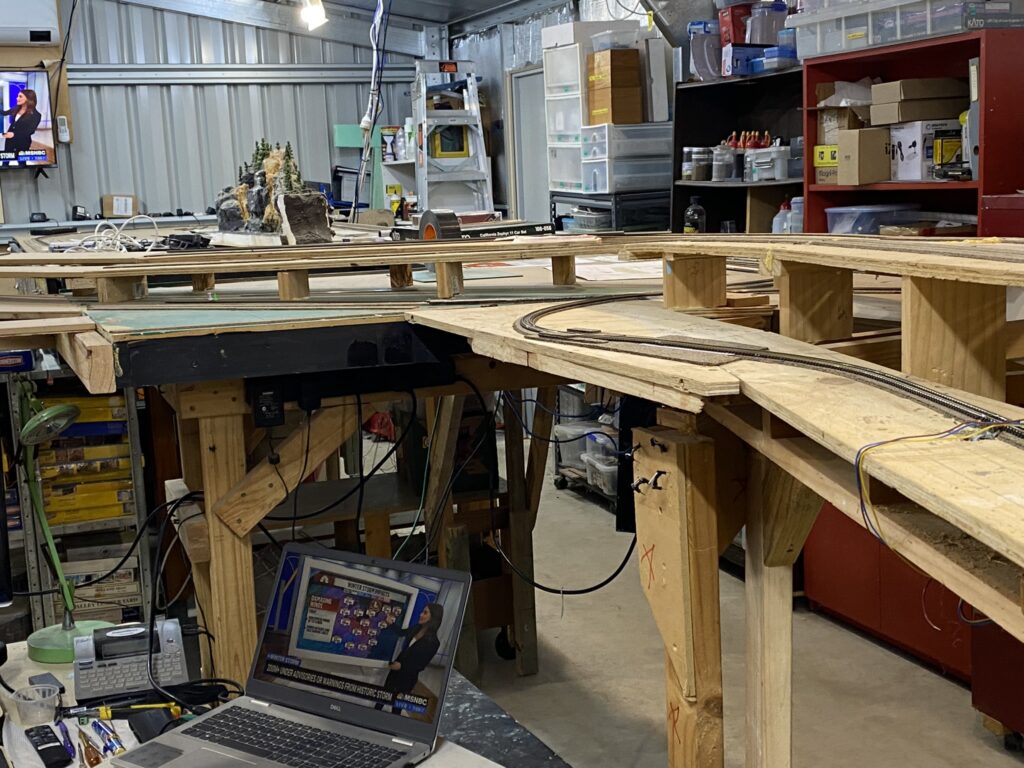
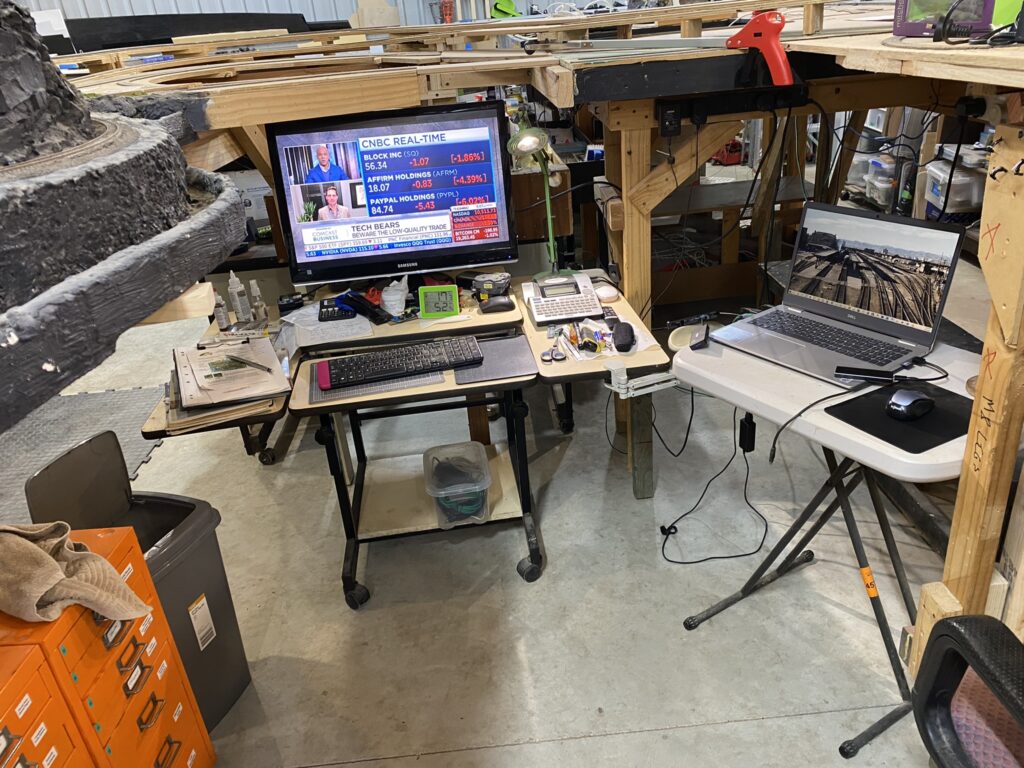
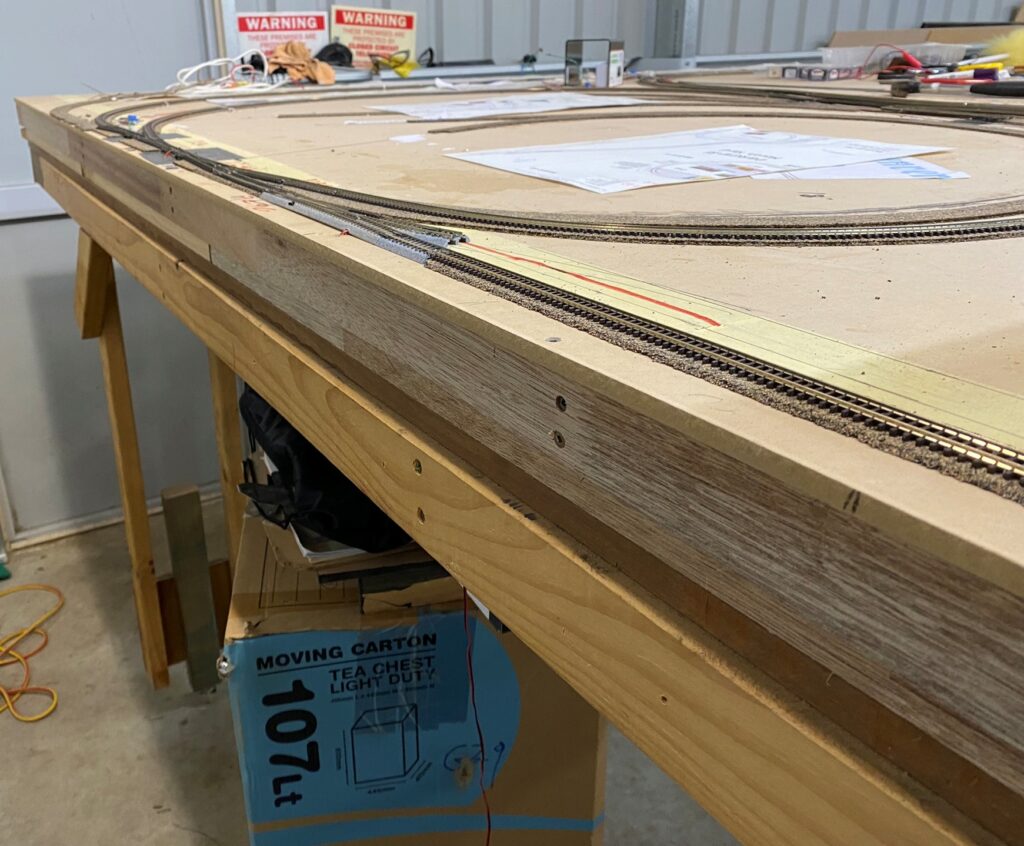
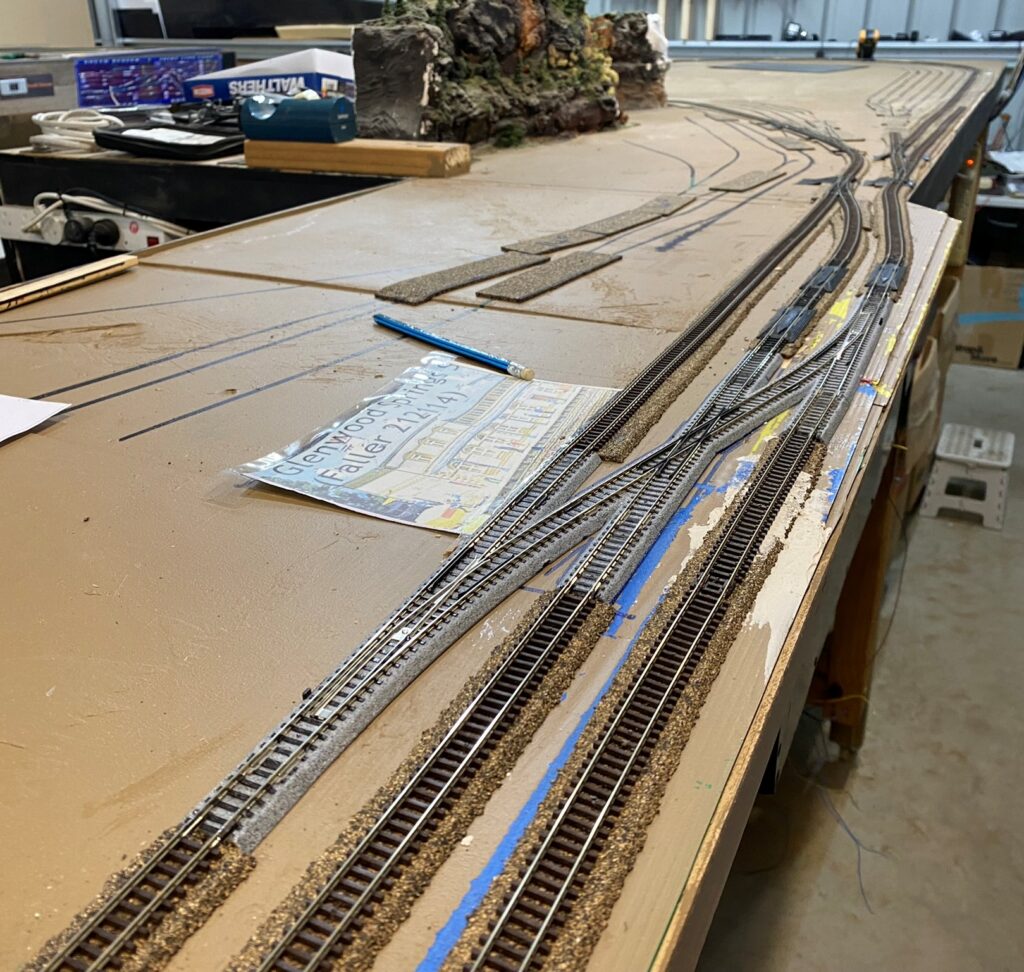
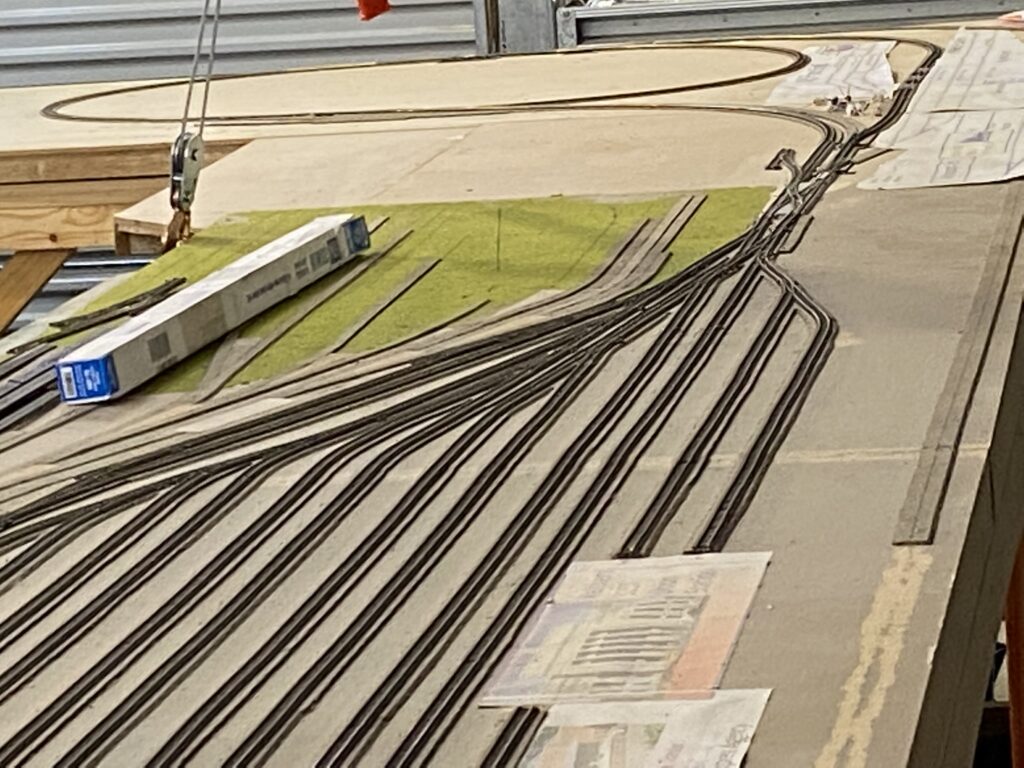
After a period of indecision, while I spent my time testing Locomotives on the new test loop of track (see first photo below) I decided that I would build west from the test loop to the Grand Junction return loop.
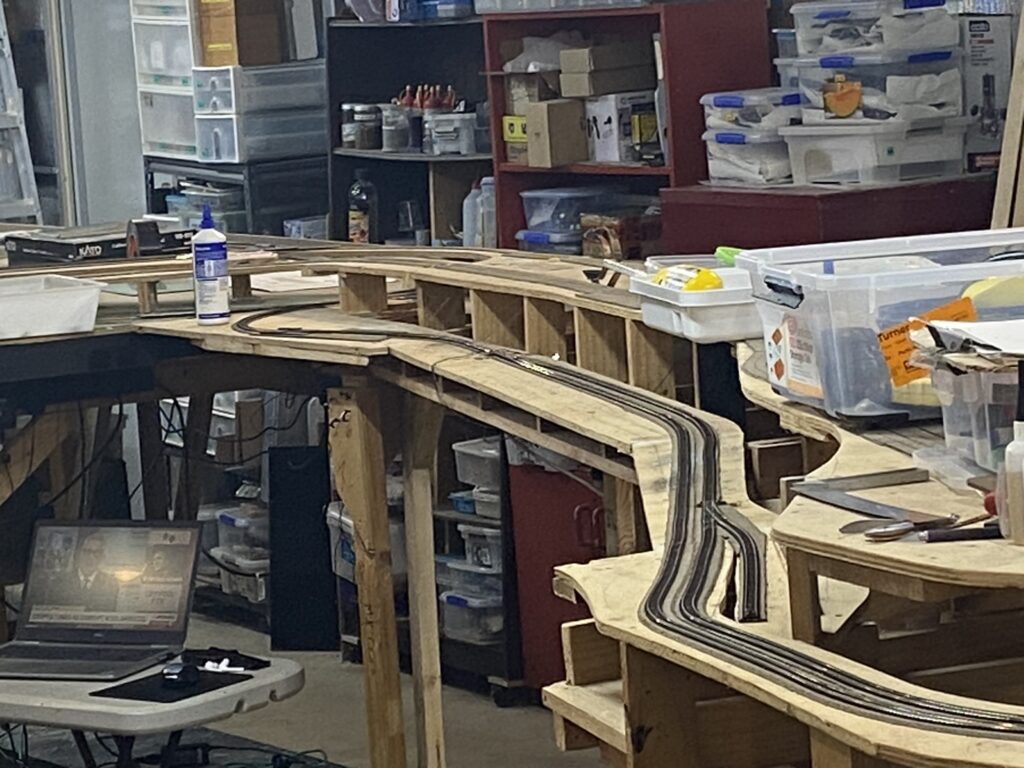
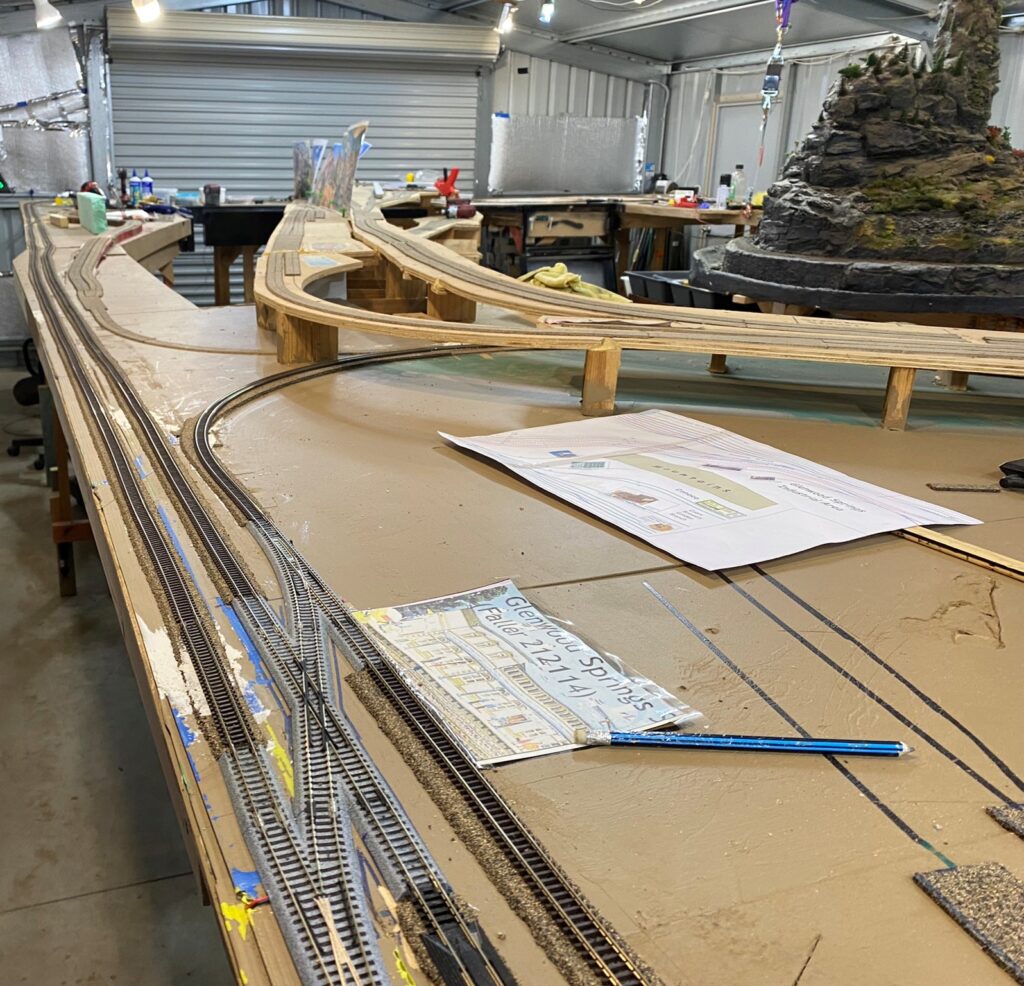
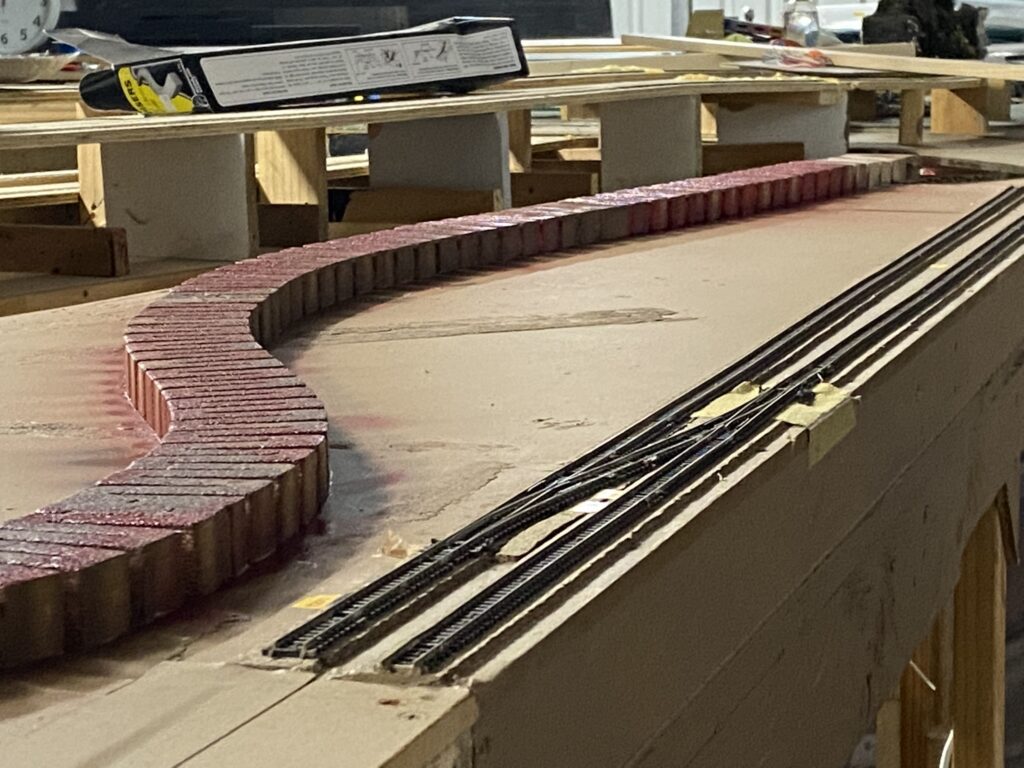
What I have done, and can be seen in the following photographs, is build the CB&Q and UP main line from the test track loop all the way to a single loop of track, being part of the Grand Junction loop. I have installed all of the main line turnouts as I went so that I can build on from the main line as required.
The UP main line is on the left and the CB&Q and Rio Grande main lines are on the right.

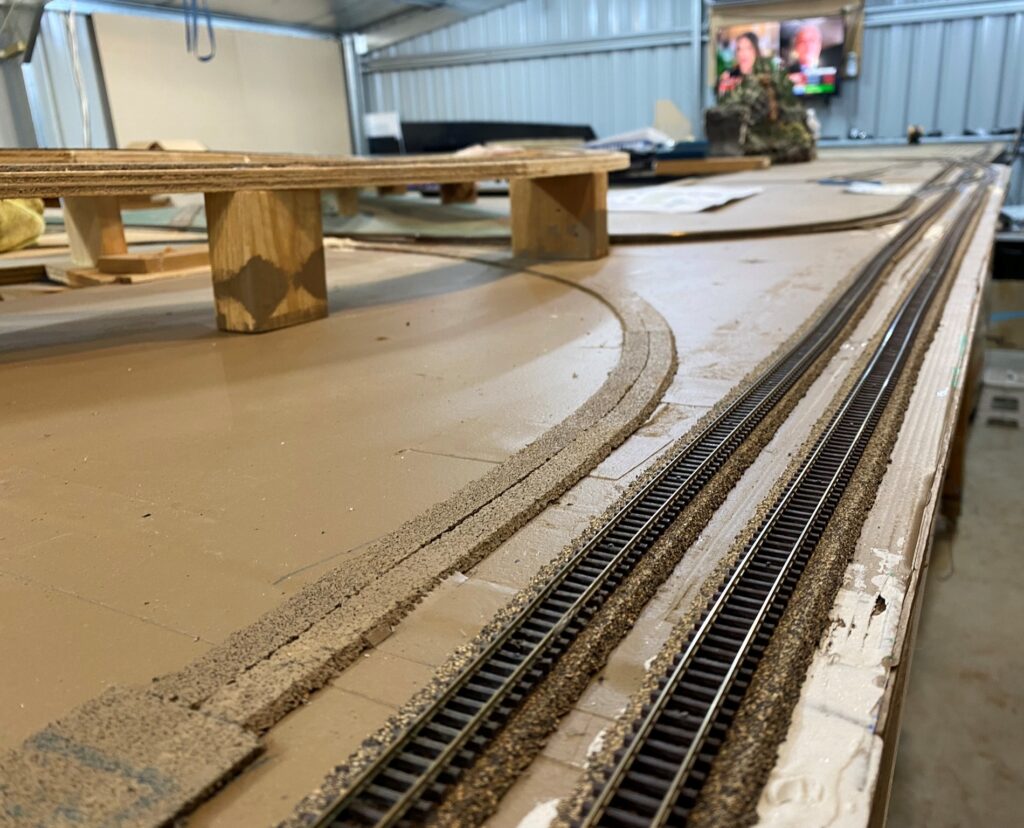
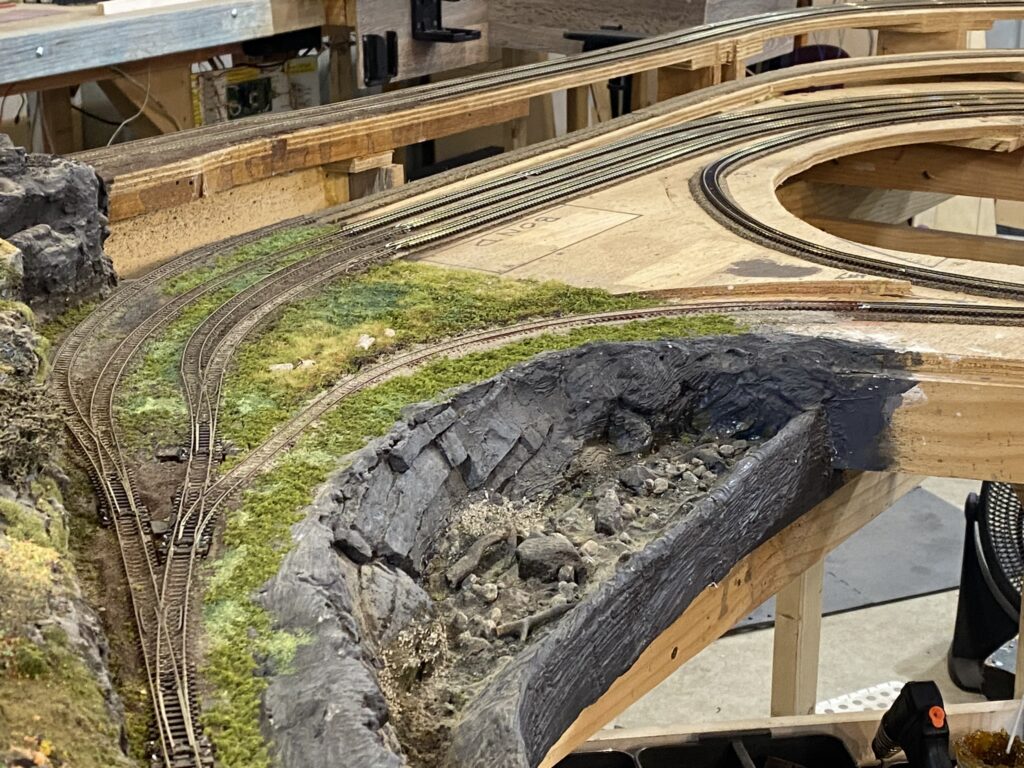
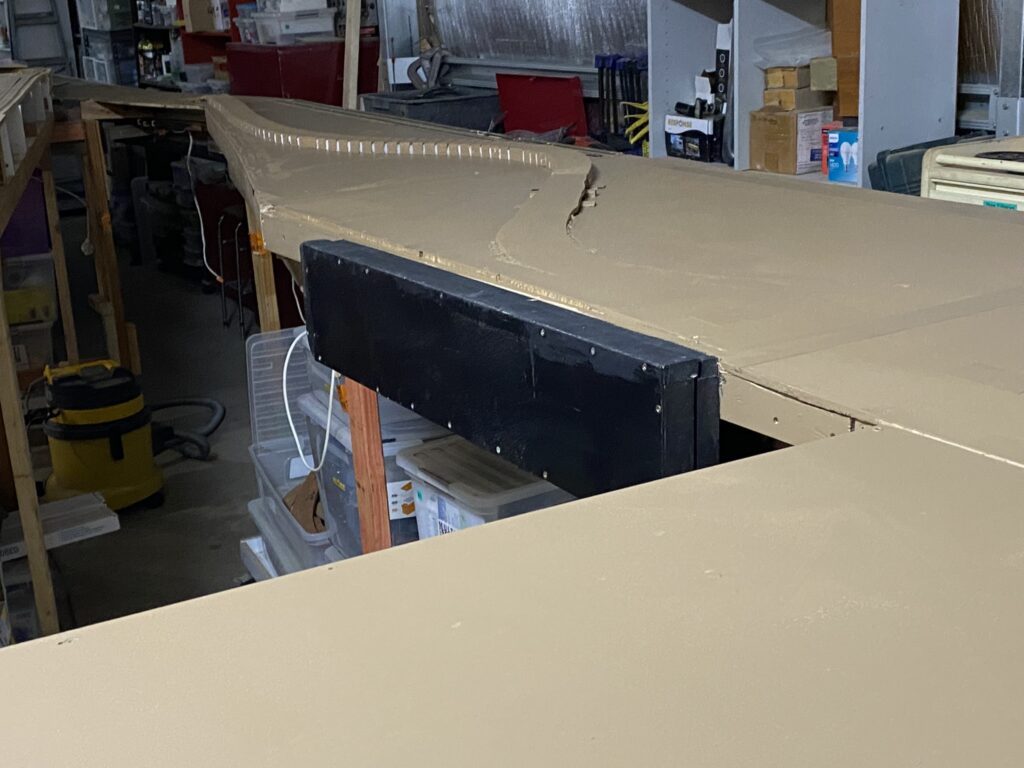
I add some spray can paint
The Woodland Scenics risers are great but I hate how white they look. I had brush painted the sub-roadbed but I needed to spray paint the insides of the risers to remove the “white” look. With hindsight I should have sprayed a diluted brown or black wash, which would have been a lot cheaper than rattle cans.
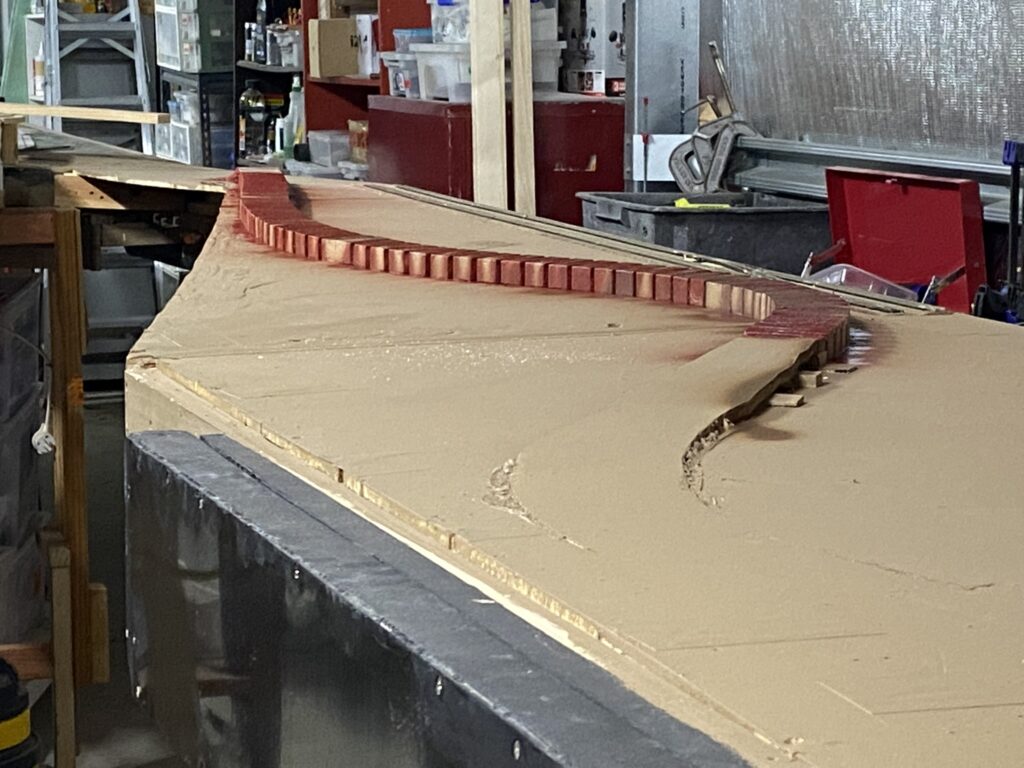
I paint the sub-roadbed a dirty brown
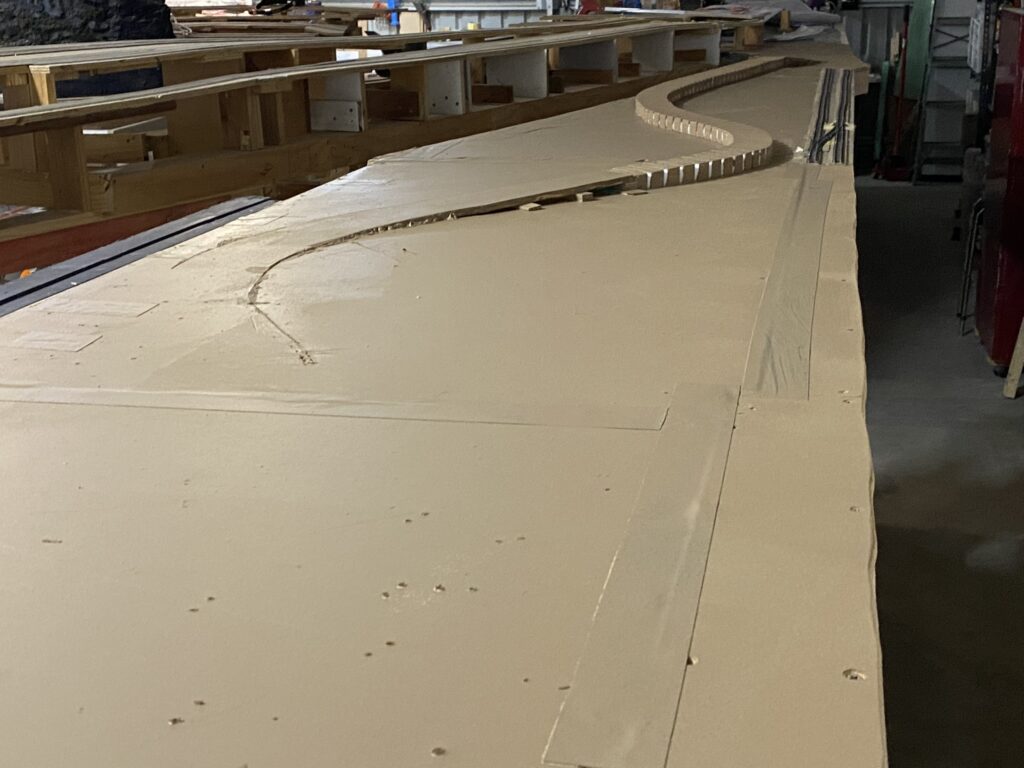
Struck a bit of a problem
First I discovered that the Gaugemaster GM500 Self Latching Relay did not work with DCC. I knew there was a GM500D DCC Relay but I had not realised that the GM500 would only work with analog connections. So I have ordered some GM500D’s from Hattons, but the Royal Mail is taking an uncharacteristic long time to arrive in Australia.
In the meantime I switched from NCE Snap-Its to DCC Concepts SX Accessory Decoders, which have the extra SPST switches, provided by the GM500D, built in. Unfortunately at the same time the temperatures in Perth shot up to 40°C and my LED lights started giving me false readings. On top of that I already had a situation where a number of NCE BD-20 block detectors were giving false readings.
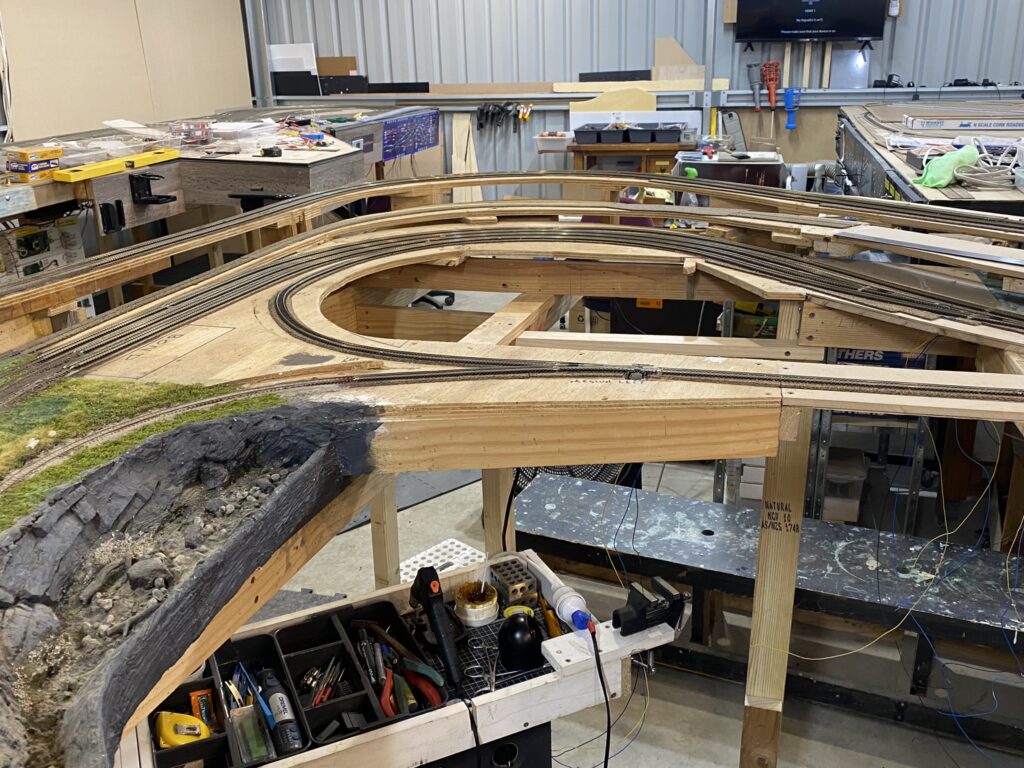
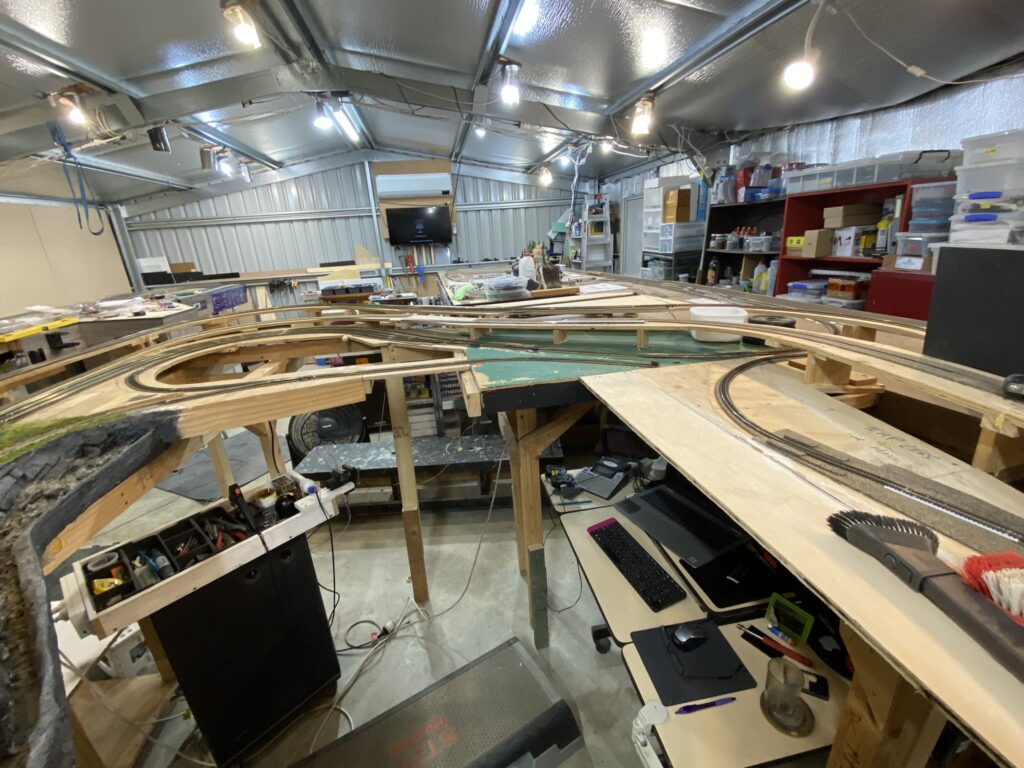
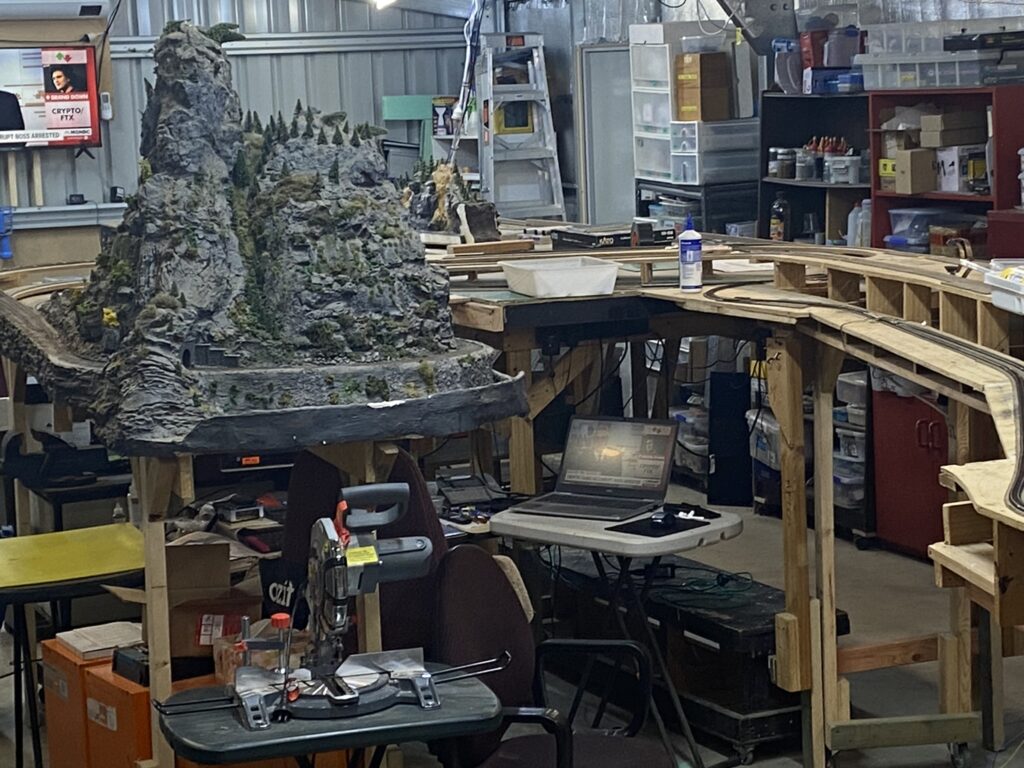
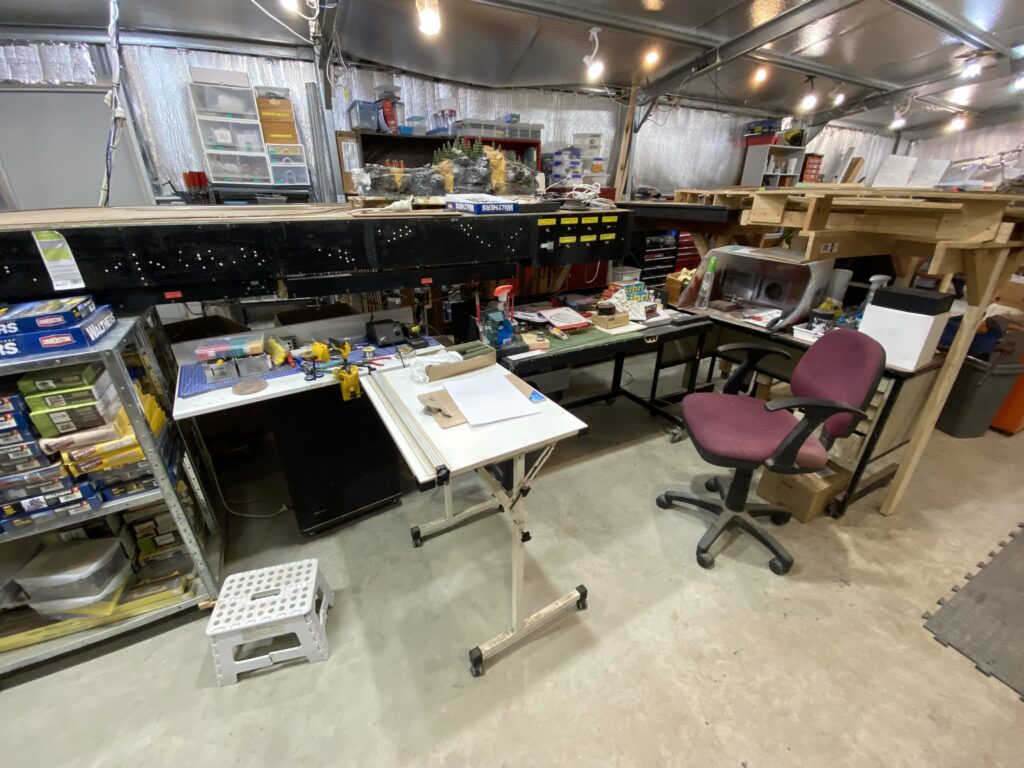
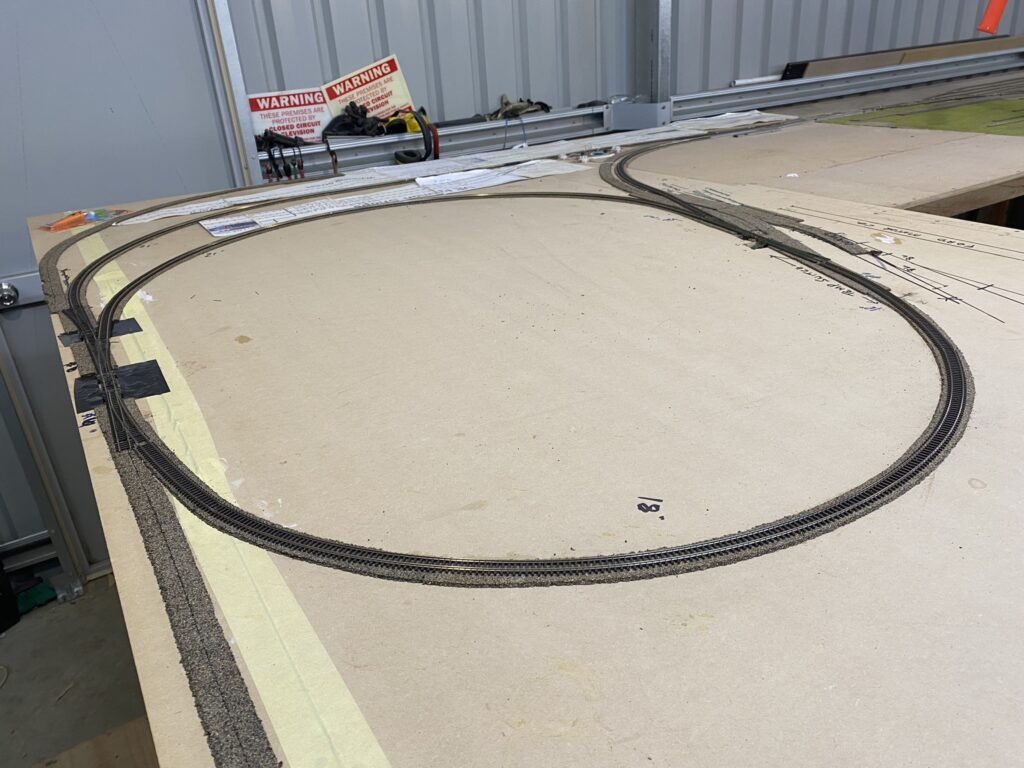
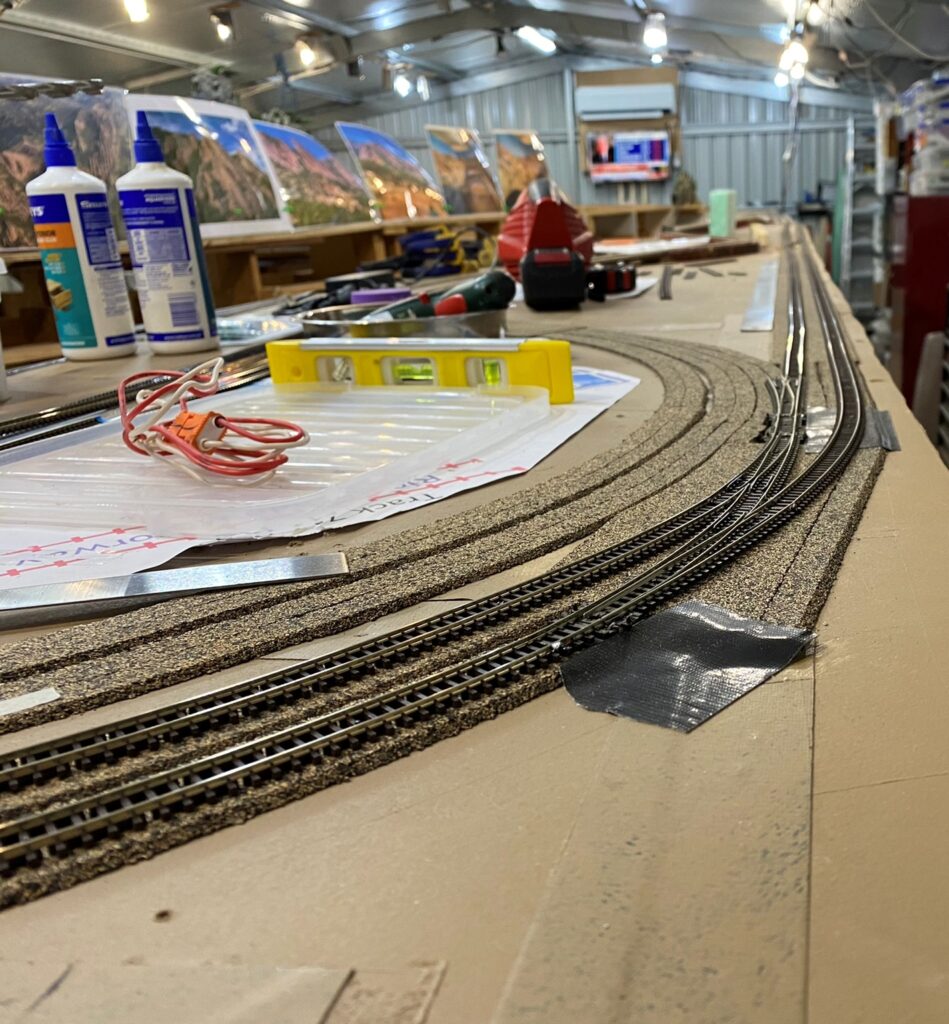
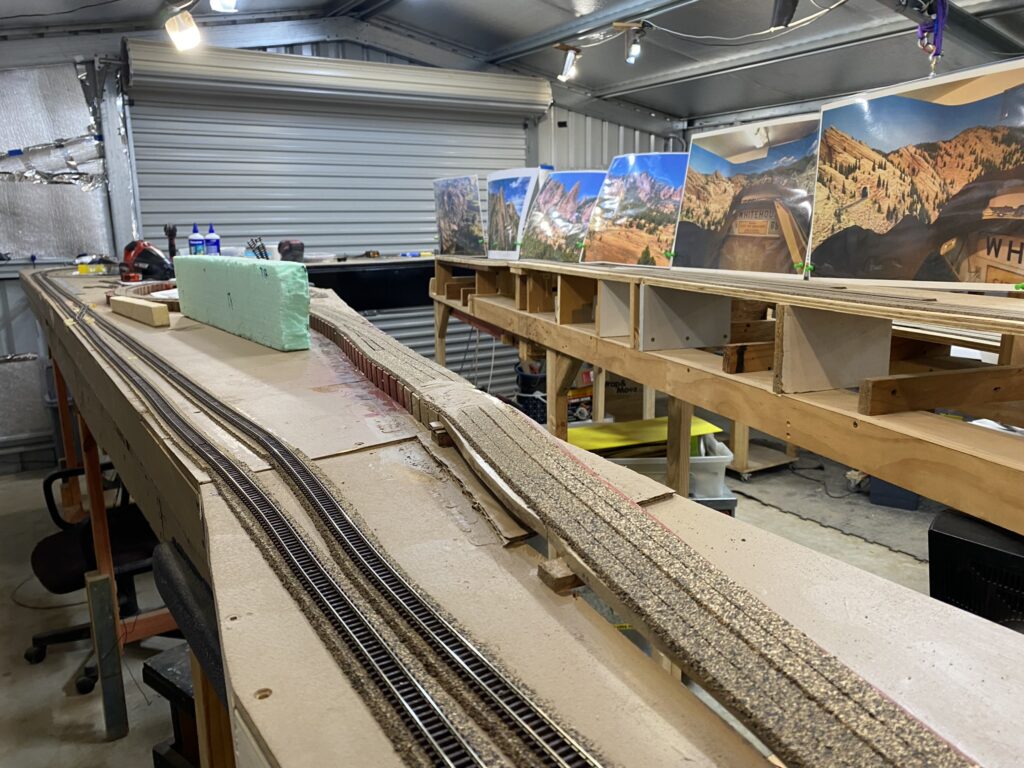
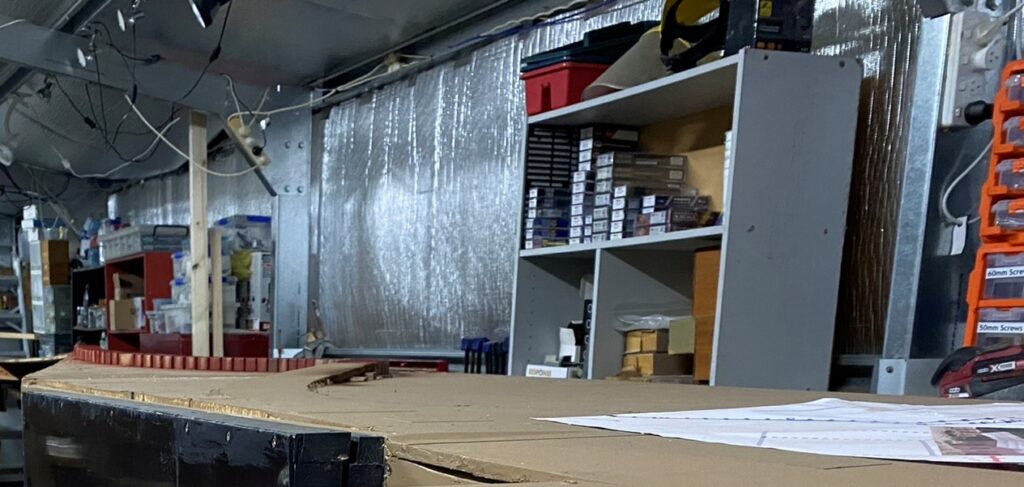
At that stage I threw up my hands in horror and started work on creating the Big 10 Curve on modules 7 & 8.
It had also become apparent that using an oval of track about 11 meters (36′) long was too big to be of use as a test track. It just took too long for a train to complete the loop. Consequently I decided to add a temporary loop of track as can be seen in the following photographs.


Once I have finished painting the sub roadbed on the baseboard I will return to wiring the South Denver Control Panel and hopefully the GM500D relays will arrive soon. I will also restart speed matching my locomotives using JMRI Decoder Pro, as well as weighting my rolling stock and coupler matching.